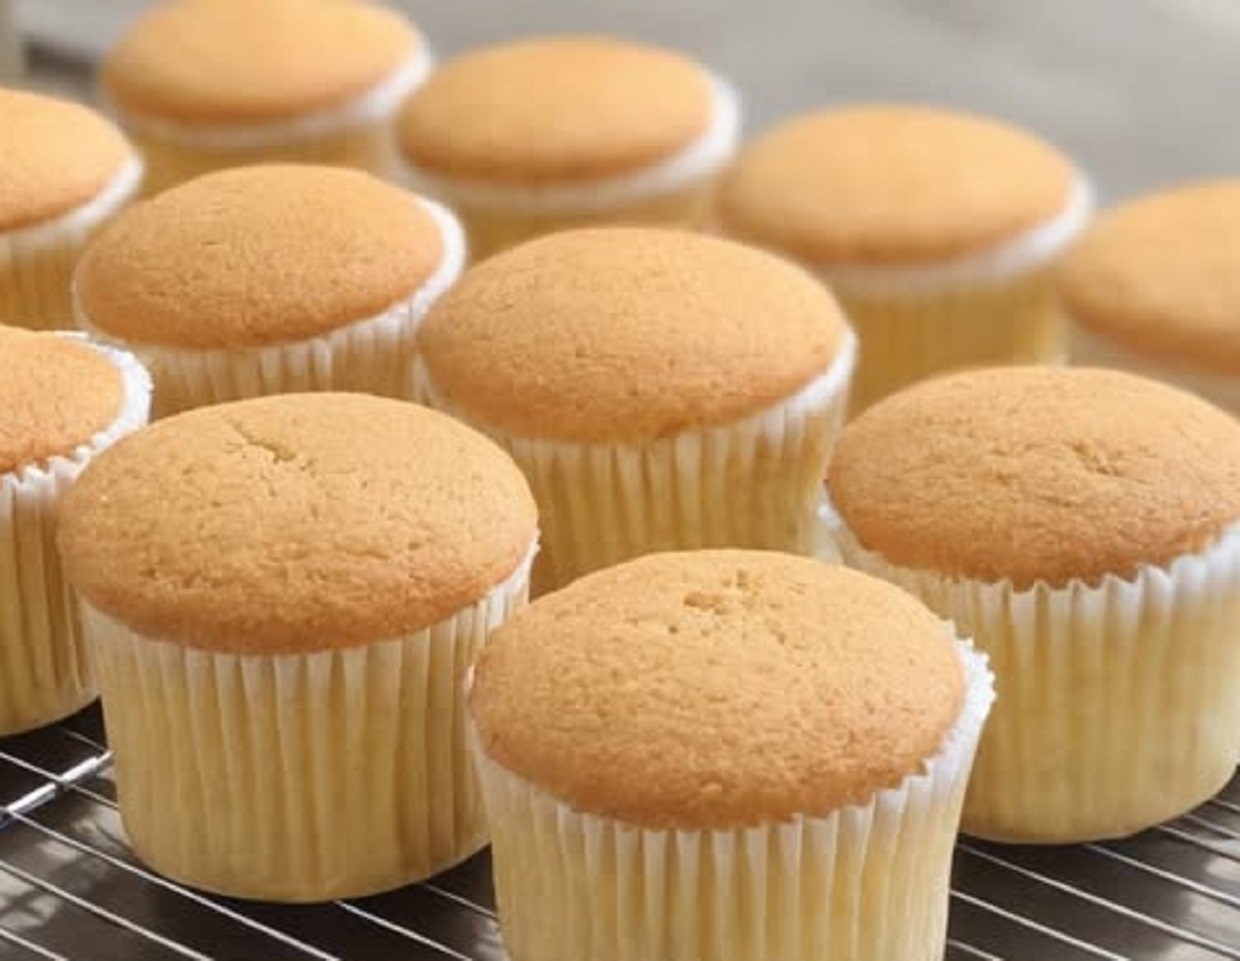
When I need a quick, no-fuss dessert that still tastes like a warm hug, I turn to these milk cupcakes. They’re soft, subtly sweet, and enriched with the creamy richness of condensed milk. Whether I’m prepping a full dessert spread or just need a bite-sized treat with tea, these cupcakes check all the boxes. Simple ingredients, fast prep, and a light, moist crumb that practically melts in your mouth this is the kind of recipe that every home baker and professional chef should keep in their back pocket.
Why I Love Baking Milk Cupcakes
These cupcakes are my go-to for a reason: they deliver big flavor with minimal effort. There’s no butter to cream, no electric mixer required, and yet the result feels indulgent. The condensed milk adds a silky depth while keeping the batter moist. If you’ve ever wanted to create a dessert that feels nostalgic and elegant at the same time this is it.
- Quick and easy: Ready in under 30 minutes start to finish
- Moist and tender: Condensed milk ensures perfect texture
- Minimal ingredients: Simple pantry staples, no fancy tools
- Versatile: Pair with frostings, glazes, or fresh fruit
- Kid-friendly: Mild sweetness and small portions make them ideal
“If clouds could bake, they’d taste like milk cupcakes.” – @CupcakeCraver
Step by Step Guide to Making Milk Cupcakes
Ingredients
- 50g cake flour
- 30g condensed milk
- 35g sugar
- 1/4 tsp baking powder
- 1/8 tsp salt
- 1/4 cup milk
- 1/4 cup vegetable oil
- 1/2 tsp vanilla extract
Directions
- Step 1: Preheat the oven to 350°F (180°C). Line your cupcake tin with paper liners or lightly grease them if you prefer.
- Step 2: In a medium bowl, sift together the cake flour, baking powder, and salt. This gives you a lighter crumb and ensures even mixing.
- Step 3: In a separate bowl, whisk together the condensed milk, sugar, milk, vegetable oil, and vanilla extract until fully blended and smooth.
- Step 4: Gradually add the dry ingredients into the wet mixture, stirring gently until just combined. Be careful not to overmix.
- Step 5: Spoon the batter evenly into the cupcake liners, filling each about 2/3 full to give them room to rise without overflowing.
- Step 6: Bake for 15-18 minutes or until a toothpick inserted into the center comes out clean. The tops should be lightly golden and springy to the touch.
- Step 7: Let the cupcakes cool in the tin for a few minutes before transferring them to a wire rack to cool completely.
Chef’s Pro Tips and Variations
Make It Your Own
- Top with whipped cream or buttercream for extra indulgence.
- Add citrus zest like lemon or orange for a bright twist.
- Mix in chocolate chips or tiny fruit pieces like blueberries for bursts of flavor.
- Make mini cupcakes for party platters or lunchbox snacks just reduce the bake time to 10-12 minutes.
The Secret’s in the Stir
This recipe relies on careful mixing. You don’t need to whip air into the batter the baking powder takes care of the rise. Instead, you want a smooth, cohesive mix. I use a spatula or wooden spoon and stop the second no dry streaks remain. Overmixing is the most common mistake I see, even from pros. It leads to dense, chewy cupcakes not the soft, pillowy texture we want.
Don’t Skip the Condensed Milk
That little 30g of condensed milk makes a huge difference. It not only sweetens the cupcakes naturally but adds richness and moisture you just can’t replicate with plain sugar. I once tried substituting it with extra milk and sugar in a pinch it wasn’t the same. If you want that melt-in-your-mouth feel, don’t skip it.
“Condensed milk is the fairy dust of baking it turns ordinary into magical.” – @SweetWhisk
Common Questions About Milk Cupcakes
Can I use all purpose flour instead of cake flour?
Yes, but cake flour gives a finer, softer crumb. If using all-purpose, try removing 1 tablespoon per ½ cup of flour and replacing it with cornstarch for similar results.
How do I know when they’re done?
The tops should be lightly golden and spring back when gently pressed. A toothpick should come out clean or with just a few crumbs.
Can I frost them?
Absolutely! These are perfect with vanilla buttercream, whipped cream, or even a light glaze. They’re just as delicious plain too.
How long do they stay fresh?
Store in an airtight container at room temperature for up to 2 days, or in the fridge for 4-5 days. Warm slightly before serving for best texture.
Best Ways to Serve Milk Cupcakes
- Serve warm with a glass of cold milk or a cup of tea.
- Top with berries and powdered sugar for a pretty dessert plate.
- Drizzle with caramel or chocolate sauce for an indulgent twist.
- Layer with whipped cream and fruit for a mini trifle effect.
Real Life Kitchen Lessons I’ve Learned
Underestimating the Rise
Early on, I filled the cupcake liners almost to the brim thinking, “More batter, more cupcake.” Bad move. They overflowed, lost their shape, and stuck to the pan. Stick to 2/3 full that’s the golden rule for a rounded, dome-top finish without a mess.
The Forgotten Vanilla Episode
One hectic morning, I whipped up a batch and realized after they were in the oven I’d forgotten the vanilla. The cupcakes still baked well, but the flavor was flat and dull. Since then, I double-check my ingredients before mixing. A half teaspoon of vanilla makes a world of difference.
Condensed Milk Substitutions Gone Wrong
Once, I tried using evaporated milk instead of condensed milk when I ran out. Spoiler: it didn’t work. The flavor was bland, the texture was dry, and I had to start over. If you’re in a pinch, make your own sweetened condensed milk ahead of time, or keep a few small cans on hand just for baking emergencies.
Cooling Patience Pays Off
Like many bakers, I’ve burned my fingers trying to peel cupcake liners off too early. Let them cool on a wire rack for at least 15 minutes. The liners come off clean, and the crumb sets beautifully. I know it’s hard to wait but it’s worth it.
If you’re into milk-based bakes, you’ll also love these homemade soft and fluffy milk buns perfect for breakfast or tea time.
More Expert Insights From My Cupcake Bakes
Experimenting With Frostings
After nailing the texture of these milk cupcakes, my next mission was to find the perfect toppings. At first, I stuck to traditional buttercream vanilla, chocolate, and occasionally strawberry. But I quickly discovered these cupcakes are a blank canvas. Their subtle sweetness pairs beautifully with a variety of frostings. One of my favorites? A whipped cream frosting with just a touch of condensed milk for continuity. I also love a light lemon glaze that complements the milk base without overpowering it. If you’re going the decadent route, a condensed milk caramel drizzle is pure heaven. The key is balance nothing too heavy, or it overshadows that delicate crumb.
Mastering Mini Cupcakes for Events
Milk cupcakes aren’t just great for the home kitchen they’re a *caterer’s dream*. When prepping for events or tea service, I often make mini versions. They bake in just 10 minutes, look adorable on a platter, and are the perfect two-bite indulgence. But mini cupcakes require precision. Too much batter and they overflow. Too little and they dry out fast. I use a small ice cream scoop to portion exactly 2/3 of each liner, then rotate the tray halfway through baking for even browning. It’s little things like that that elevate your cupcakes from simple to professional.
Pairing Cupcakes With Beverages
Let’s talk pairings because milk cupcakes really shine when matched with the right drink. For brunch, I love serving them with iced lattes or a glass of cold brew. The soft texture plays beautifully against strong, roasted coffee. In the evening, warm chai or green tea adds a gentle spice that elevates the vanilla and milk flavors. Even kids love pairing them with a chilled glass of strawberry milk. Don’t underestimate the impact of beverage pairing it completes the experience and makes your cupcakes stand out at any gathering.
Hosting With Cupcakes
If you’re entertaining, this recipe is your secret weapon. I’ve hosted everything from family brunches to baby showers using these cupcakes as the star. I often create a DIY cupcake bar plain cupcakes, 2-3 frosting choices, and toppings like sprinkles, crushed cookies, fruit, or nuts. It’s fun, interactive, and keeps guests coming back for more. Plus, it turns a simple dessert into an *experience*. People love customizing their own, and it adds a personal touch that makes your event memorable.
Using Milk Cupcakes as a Cake Base
This may surprise you, but the batter from these milk cupcakes makes an excellent base for small layered cakes. I’ve poured it into 6-inch round cake pans (doubling the recipe) and used it as the foundation for birthday cakes, baby cakes, and even tiered celebration minis. The texture holds up well under light frosting and stacks beautifully. Just reduce the oven temp slightly to ensure an even bake through the center, and monitor closely toward the end. You’ll have a moist, flavorful cake with minimal effort.
Scaling the Recipe Like a Pro
One of the things I love about this recipe is how well it scales. Double it, triple it just maintain the ratios and you’re golden. But here’s a chef tip: when scaling up, mix the wet and dry ingredients separately in batches, then combine gently. This prevents overmixing and keeps your crumb light. I also recommend switching from a hand whisk to a silicone spatula or stand mixer with a paddle when making large batches. It saves time and ensures consistency across the board. Whether you’re baking a dozen or fifty, this recipe holds up beautifully.
“Cupcakes are more than dessert they’re a way to say ‘I made this just for you.'” – @BatterWhisperer
Calories and Nutrition
- Calories: ~120 per cupcake
- Fat: 5g
- Carbs: 16g
- Protein: 2g